
How to Upload Files in Asp.Net
|
The terms Uploading and Downloading is very common to all of us.Now using the .net platform we can also download files as well as upload files on the server.Here in this section I will discuss how to upload files with source codes
Uploading Files : 
|
|
Here in the above diagram we can see
Asp.net FileUpload tool is used to browse files from the computer
Labe1-this label is used during runtime for displaying messages or errors
Button1-Named “Upload”- This is the button under which the main program source code is written. After choosing the file ,the”Upload” Button is clicked to upload the desired file to the server.
*Note-> In order to upload a file we need to create a folder where the file will be uploaded. Here in the above example I have used “Images” folder.
*Note-> The most important thing in order to upload a file is we must include the “ Using System.IO” .
Coding:
using System;
using System.Data;
using System.Configuration;
using System.Collections;
using System.Web;
using System.Web.Security;
using System.Web.UI;
using System.Web.UI.WebControls;
using System.Web.UI.WebControls.WebParts;
using System.Web.UI.HtmlControls;
using System.IO; //important*****
public partial class hu : System.Web.UI.Page
{
protected void Page_Load(object sender, EventArgs e)
{
}
protected void Button1_Click(object sender, EventArgs e)
{
String filename = "";
if (FileUpload1.HasFile)//HasFile returns true if
// the controls contains file
{
filename = Path.GetFileName(FileUpload1.PostedFile.FileName);
string ext = Path.GetExtension(FileUpload1.PostedFile.FileName);
if (ext.Equals(".jpg") || ext.Equals(".gif") || ext.Equals(".png") || ext.Equals(".bmp"))
{
//now save the file to the server folder upload
//Server.MapPath return the curent path like localhost:portnumber/first
FileUpload1.PostedFile.SaveAs(Server.MapPath("images/" + filename));
Label1.Text = "Uploaded successfuly"; // here only image format files can be used.If we want to remove the exception then we do not need to use the if loop.
}
else
{
Label1.Text = "File Type is not supported";
return;
}
}
}
}
OutPut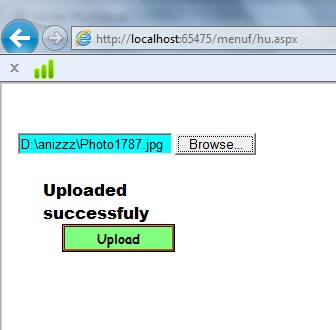
The browse window opens after clicking the browse button.

|
